How to pour a concrete pad
Pouring a concrete pad at home is not the most difficult of tasks when you break it down into steps. Making sure that all your materials are in place will help to ensure the process goes quickly and smoothly. When working with such heavy, wet material mistakes can cause injuries or damage to structures, so it's important to be prepared and know what you're doing.
Concrete pad pouring should only be done when temperatures allow for fresh concrete mix to set properly: ideally no more than 20 degrees Celsius (70 Fahrenheit) and no lower than 5 degrees Celsius (40 Fahrenheit). If weather conditions aren't suitable then wait until they are - this will save you time, effort and money!
Before you get started here are some basic safety precautions: wear closed-toe shoes, wear gloves to protect your hands, wear eye protection and make sure anyone who might be on the work site knows what you're doing. If you have long hair make sure it's completely covered or contained (such as in a hat) and never work around moving vehicles - if possible move them out of the area entirely.
The first step in the process is to a frame for your concrete slab. This is done with 4 x 4 or 6 x 6 beams and posts. If you already have a flat surface on which to pour your pad, great; if not you can make one by clearing away any obstructions and digging and compacting the base (this is called screeding). A layout string line can be pulled using stakes and string in order to create an accurate guide for laying out your beams accurately. This will help later when it comes time to mix concrete so that it's poured precisely where you need it.
Step number two is to prepare the area. If you already have a space where the framing will be placed then perfect! If not then you will need to dig out the area in order to create space for the cement. This is done with a shovel and wheelbarrow, and should be deep enough to allow for the required depth of your concrete pad (which will vary depending on what you're planning to use it for). Concrete pads can be poured over any type of surface so long as said surface is relatively level, compact and cleared. Stone or gravel surfaces should be compacted appropriately before pouring: heavy equipment can create too much uneven compression if left around the construction site. If the pad needs to run alongside an existing structure or driveway, make sure that it's clear of obstructions including grass, roots or anything else that might make its way into the concrete once it's poured.
Once everything is in place it's time for step three which is to mix the concrete! Concrete mixes are available at most hardware stores in bags. A simple mix will do the trick for most jobs - there are fancier mixes available but you needn't worry about any of them for now. The basic steps are to fill the mixing container with water, open up your bag of concrete and dump it in then get to mixing! Wheelbarrows make great mixing containers and a simple shovel can be a very efficient mixer, but you can be create and work with what you have! Of course for larger projects a cement mixing truck will be needed, and if this is the case then you can call Calgary Concrete Services, but for smaller jobs you can mix it yourself with relative ease of use. Make sure that it's mixed thoroughly and don't forget to check for lumps or other substances that may be present: stirring is easier than fishing tiny objects out afterwards!
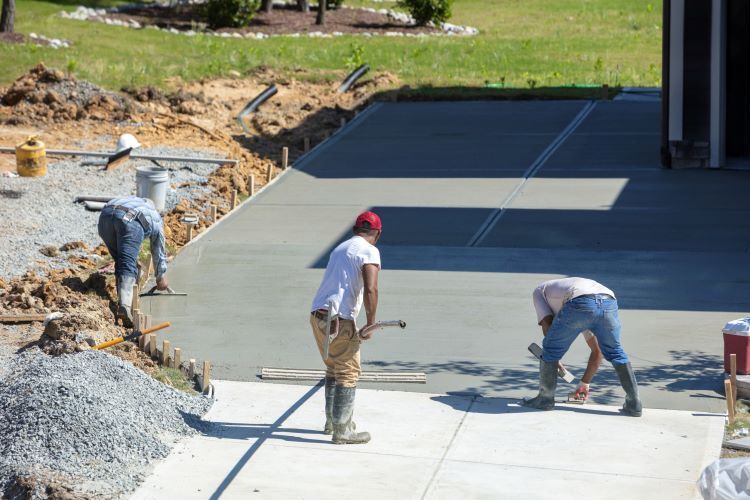
Step four is pouring the concrete pad itself. If your frame was built correctly then all you'll need to do here is slowly pour the wet concrete into it as evenly as possible. Keep an out that everything has filled properly in order to avoid any obvious gaps in the pour. The more even you are able to get this process, the better your final product will look in the end. Concrete is quite heavy when wet so it's important that everything is stable throughout the process or else things may shift or fall over which could be dangerous! It's also very time-consuming - for a larger pad it can take up to 24 hours before its dry enough to work with without risk of ruining your concrete job! Once poured and set up, all you need to do now is let the concrete pad sit for a while. For most jobs it will require at least overnight which should give you enough time to finish whatever project requires said pad. Smaller pads may only need a few hours to set up, but larger ones will require more time (and thus patience).
Step number five is the finishing touches. Once your new concrete pad has had time to dry and firm up then you can remove the framing and use what you need! If it's just something simple like a parking pad or patio area then all that's needed is some basic cleaning and maybe a bit of decorative sand for texture and grip. Finished concrete patios can be very smooth and slippery if not treated correctly: this isn't necessary with every single job so do check before you find yourself needing sand. However if your project requires something else such as an outdoor walkway or decking than you'll want to consult different resources such as Calgary Concrete Services, as we can provide you with a better idea of what you'll need and how to go about it!
If you're pouring a pad in the winter then be sure to take extra measures such as using sand instead of salt around the edges and keeping shop lights or construction lamps turned on overnight so that any frost that forms doesn't block the curing process. If you plan on storing liquids such as gas, oil or pesticides in your structure then also keep them warm so they don't freeze over. To do this heaters can be installed inside buildings with this purpose or use an enclosure made from corrugated polycarbonate sheeting , which is considered by many professionals to be the superior material for cold climate applications since it provides superior protection against frost. If you're in an especially cold area it is advisable to make sure your construction site is clear of any trees whose dropping needles may damage or disrupt the surface of new concrete.
Concrete pad pouring is a relatively simple process that can save you time and money, but only if done properly. With careful planning and following these steps you'll be able to enjoy your new concrete space in no time!
Thank you for reading this article about how to pour a concrete pad. It was written by the staff at Calgary Concrete Services, specializing in residential and commercial applications around Calgary, Alberta, Canada. We would appreciate it if you shared this article with friends or family who might also need our help so that we can help them in their concrete needs.