Get in touch
587-851-3477
sadiamjaad@gmail.com
Blog
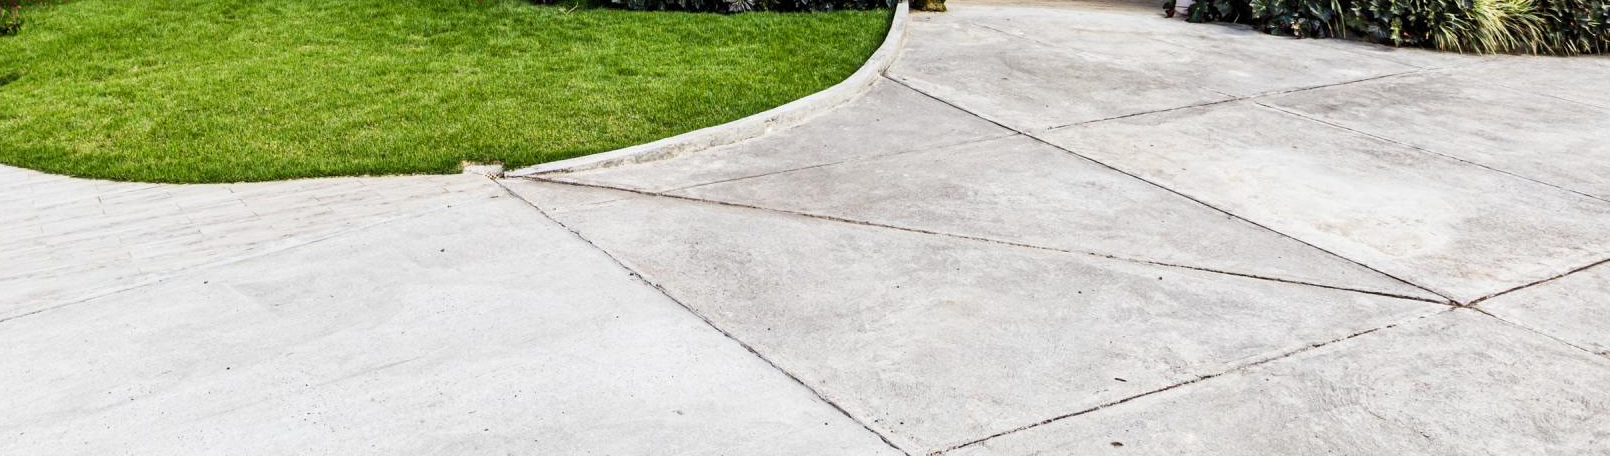
Pouring a concrete pad at home is not the most difficult of tasks when you break it down into steps. Making sure that all your materials are in place will help to ensure the process goes quickly and smoothly. When working with such heavy, wet material mistakes can cause injuries or damage to structures, so it's important to be prepared and know what you're doing. Concrete pad pouring should only be done when temperatures allow for fresh concrete mix to set properly: ideally no more than 20 degrees Celsius (70 Fahrenheit) and no lower than 5 degrees Celsius (40 Fahrenheit). If weather conditions aren't suitable then wait until they are - this will save you time, effort and money! Before you get started here are some basic safety precautions: wear closed-toe shoes, wear gloves to protect your hands, wear eye protection and make sure anyone who might be on the work site knows what you're doing. If you have long hair make sure it's completely covered or contained (such as in a hat) and never work around moving vehicles - if possible move them out of the area entirely. The first step in the process is to a frame for your concrete slab. This is done with 4 x 4 or 6 x 6 beams and posts. If you already have a flat surface on which to pour your pad, great; if not you can make one by clearing away any obstructions and digging and compacting the base (this is called screeding). A layout string line can be pulled using stakes and string in order to create an accurate guide for laying out your beams accurately. This will help later when it comes time to mix concrete so that it's poured precisely where you need it. Step number two is to prepare the area. If you already have a space where the framing will be placed then perfect! If not then you will need to dig out the area in order to create space for the cement. This is done with a shovel and wheelbarrow, and should be deep enough to allow for the required depth of your concrete pad (which will vary depending on what you're planning to use it for). Concrete pads can be poured over any type of surface so long as said surface is relatively level, compact and cleared. Stone or gravel surfaces should be compacted appropriately before pouring: heavy equipment can create too much uneven compression if left around the construction site. If the pad needs to run alongside an existing structure or driveway, make sure that it's clear of obstructions including grass, roots or anything else that might make its way into the concrete once it's poured. Once everything is in place it's time for step three which is to mix the concrete! Concrete mixes are available at most hardware stores in bags. A simple mix will do the trick for most jobs - there are fancier mixes available but you needn't worry about any of them for now. The basic steps are to fill the mixing container with water, open up your bag of concrete and dump it in then get to mixing! Wheelbarrows make great mixing containers and a simple shovel can be a very efficient mixer, but you can be create and work with what you have! Of course for larger projects a cement mixing truck will be needed, and if this is the case then you can call Calgary Concrete Services, but for smaller jobs you can mix it yourself with relative ease of use. Make sure that it's mixed thoroughly and don't forget to check for lumps or other substances that may be present: stirring is easier than fishing tiny objects out afterwards! Step four is pouring the concrete pad itself. If your frame was built correctly then all you'll need to do here is slowly pour the wet concrete into it as evenly as possible. Keep an out that everything has filled properly in order to avoid any obvious gaps in the pour. The more even you are able to get this process, the better your final product will look in the end. Concrete is quite heavy when wet so it's important that everything is stable throughout the process or else things may shift or fall over which could be dangerous! It's also very time-consuming - for a larger pad it can take up to 24 hours before its dry enough to work with without risk of ruining your concrete job! Once poured and set up, all you need to do now is let the concrete pad sit for a while. For most jobs it will require at least overnight which should give you enough time to finish whatever project requires said pad. Smaller pads may only need a few hours to set up, but larger ones will require more time (and thus patience). Step number five is the finishing touches. Once your new concrete pad has had time to dry and firm up then you can remove the framing and use what you need! If it's just something simple like a parking pad or patio area then all that's needed is some basic cleaning and maybe a bit of decorative sand for texture and grip. Finished concrete patios can be very smooth and slippery if not treated correctly: this isn't necessary with every single job so do check before you find yourself needing sand. However if your project requires something else such as an outdoor walkway or decking than you'll want to consult different resources such as Calgary Concrete Services , as we can provide you with a better idea of what you'll need and how to go about it! If you're pouring a pad in the winter then be sure to take extra measures such as using sand instead of salt around the edges and keeping shop lights or construction lamps turned on overnight so that any frost that forms doesn't block the curing process. If you plan on storing liquids such as gas, oil or pesticides in your structure then also keep them warm so they don't freeze over. To do this heaters can be installed inside buildings with this purpose or use an enclosure made from corrugated polycarbonate sheeting , which is considered by many professionals to be the superior material for cold climate applications since it provides superior protection against frost. If you're in an especially cold area it is advisable to make sure your construction site is clear of any trees whose dropping needles may damage or disrupt the surface of new concrete. Concrete pad pouring is a relatively simple process that can save you time and money, but only if done properly. With careful planning and following these steps you'll be able to enjoy your new concrete space in no time! Thank you for reading this article about how to pour a concrete pad. It was written by the staff at Calgary Concrete Services, specializing in residential and commercial applications around Calgary, Alberta, Canada. We would appreciate it if you shared this article with friends or family who might also need our help so that we can help them in their concrete needs.

Concrete is a mixture of cement, sand, gravel and water. When the mixture hardens it turns into a durable material that can be used in many construction projects. Concrete has been used for more than 5000 years and with its long history comes experience in what concrete is best suited to do for construction projects. One of the most common questions asked about concrete involves when this material will crack under certain circumstances. Concrete cracks because there are forces being put on the area where the concrete is located that either pull or push from opposite directions causing cracks to appear out of nowhere. This article will discuss why does cracked occur and also provide possible prevention methods so your next project does not have to handle these issues with cracking concrete. First, let us look into the three most common reasons concrete cracks: · Heating and Cooling cycles in certain climates can pull and push concrete in different directions over time causing it to crack. The expansion and contraction happens when the temperature changes quickly which makes the material expand or contract very rapidly. · Surface water seeping down through a foundation or wall will freeze and thaw quickly. This process, like cooling and heating, puts large amounts of stress on the area where water is located which will make cracks appear out of nowhere. If this is happening, you should contact a professional immediately who can come examine your situation because this could be a sign that groundwater is rising or that there are other issues with your home such as insect infestation or mold growth. · Vibrations through the ground will shake concrete over time causing cracks to appear that you never noticed before. This usually happens in areas where there is a lot of construction being done due to heavy machinery being used which vibrates the earth under foot. If this is happening, it can be prevented by wearing ear plugs if you are spending long periods near the site of large construction equipment. There are also methods for preventing these issues from occurring with concrete so your project does not have to worry about dealing with unsightly cracks ruining the look of an otherwise sturdy structure. One way to prevent these problems with cracking concrete is always read up on what type of mixing ratio best for different climates and weather conditions. If you know what type of mixture to use in a certain area, you can make sure that the concrete will not crack as easily under any conditions. · If concrete is being used during cold weather, it is best to use a 1:2:4 ratio of cement, sand and gravel respectively rather than just 1:3 for regular temperatures. · When changing seasons from summer to winter or vice versa, another 1 to 2 inches should be added on top of the concrete so water does not freeze and thaw quickly and therefore create large cracks due to how fast this process happens . · Concrete structures located near vibrating machinery should have at least an inch gap along the sides so it is not constantly touching the walls or foundation which could lead to cracks in freezing and thawing weather conditions. Now that you know why concrete could crack and how this issue can be prevented so your structure is not ruined, you can be proactive in the future to prevent such cracks from ever happening. Our company takes pride in being able to educate and create awareness in order to prevent problems with our customers in the future. If you would like to know more about concrete or would like to schedule an appointment for an estimate make sure to give us a call today! Our team is standing by and ready to help with all your concrete related service needs.
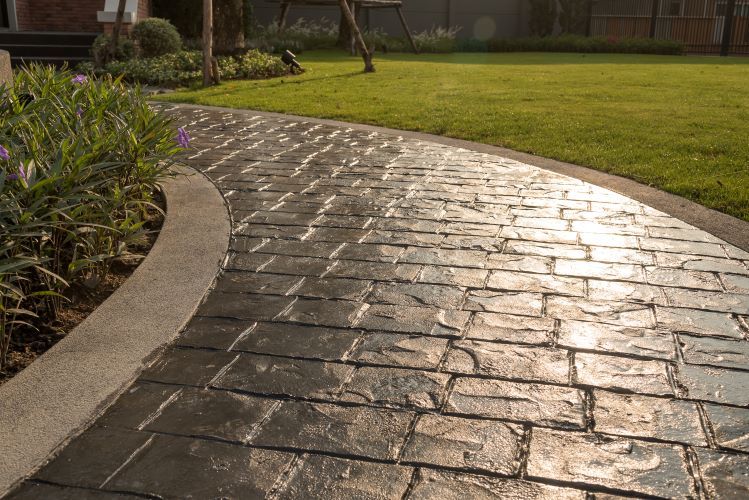
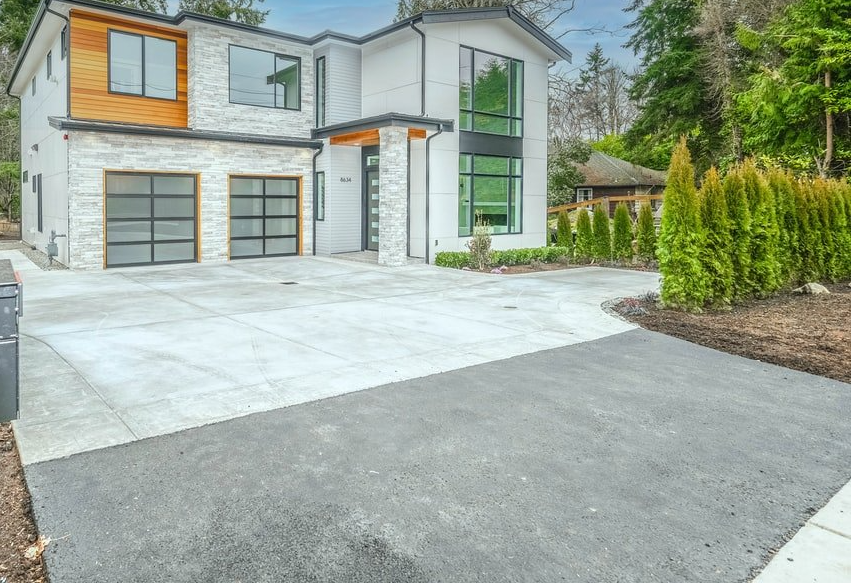
Concrete is one of the most widely used materials around the world. It has a wide variety of uses, and can be poured to fit nearly any form or shape, with many different possibilities. Concrete can appear in many colors, textures and thicknesses based on the additives that are added—so much can be done with this raw product. Concrete will typically meet its best strength and durability when it is still "green", before it fully cures. This allows concrete to be cast into molds, or processed into forms through which it can set up within 48 hours for easy removal. One popular way to create texture is by using an acid stain while it's still wet; another way is by adding colored aggregates such as pebbles or seashells. This is known as stamped concrete, also tagged with the name "textured concrete." Stamped concrete is used to create decorative designs and patterns that will give your yard a unique look and feel. Unlike other flooring surfaces, stamped concrete is designed to mimic natural stone or tile and can be customized for any size or shape space you have in mind. Calgary Concrete Services specializes in providing professional stamped concrete installation services – we'll help bring your vision to life with our personalized stamping designs. Why should I use Calgary Concrete Services? Our company has been offering high-quality service for over 15 years, giving us the experience needed to ensure your project goes well. We are licensed, bonded, insured, and available 24/7. Our team always shows up on time to every job site, and we work within your budget or offer discounts based on long-term contracts. We've been a part of many home renovations in Calgary, helping create stunning stamped concrete patios, sidewalks, driveways, entryways and pool decks that have added value to people's homes. With our experience working with stains and dyes you can rest assured knowing that we will provide premium quality service for the most competitive price around - all backed with our 100% satisfaction guarantee! Now, to get into the real reason we're all here, stamped concrete! So you may be wondering, how does the stamped concrete process work? How do you actually "stamp" concrete? Or you may just be wondering, what the heck is stamped concrete!? Well no worries, we are here to give you the breakdown you've been looking for, so let's get into it! When pouring concrete to form a solid pad, such as a walkway, a patio, or any other layout, the concrete is in a liquid form to begin the process. Once it is poured into the desired shape it is still malleable and can be formed and designed into many unique designs and patterns. In order to get these intricate lines or shapes permanently onto the concrete we use a form of physically stamping the concrete while it is still wet. The stamping process is to essentially force the concrete to adhere to our custom designed form. It is possible to make a stamped concrete pad in many different colors and patterns, it all depends on what you're looking for. These are some of the more common designs: Stamped Concrete Molds - We will help design whatever pattern or shape you have dreamed up for your perfect space! With so many options available, we can work with any budget, and get your unique pad completed as soon as possible! Our team specializes in getting that initial vision set into creation. Colored Stamped Concrete – This process allows us to dye or stain the concrete while it is still wet after being "stamped" into place; this way the stained areas will become much darker in color. This process is very attainable and can have many unique designs such as marble, brick or stone layouts to mimic the natural beauty of these materials. Stamped Concrete Overlays - This special process allows us to apply a decorative overlay to top your existing concrete pad. This can be used for easy repairs and updates without having to remove old concrete first or spend weeks improving the foundation from the ground up. It is also ideal for those just looking for that quick update! We will work with you to determine which overlay best fits your needs. Textured Stamped Concrete – With this trending method, we are able to achieve rich colors and non-skid surfaces while adding a textured finish that is perfect for all areas of your home. We are able to create a stunning patio that is not slippery when wet or add an elegant touch to any room in your house! We may also be able to use color blends of concrete dyes and stains, which allows us to blend different colors together creating unique patterns and designs while manually applying them with our specialized tools. This process results in deeper, darker colors within the stamped concrete that really pop off the surface. However you decide to go about it we will get started on designing your personalized stamped concrete pad! We understand you may not be familiar with certain processes involving concrete, and as a result you may have question or concerns regarding the project you need done, but that's why we want you to know our team is always here to help. Let's chat today about how we can turn your dreams into reality, contact Calgary Concrete Services today for a free estimate on concrete stamping and all of our other great services!
Pouring a cement pad is a project that can be completed by the do-it-yourself homeowner with some experience. However, it is important to take the time and prepare before beginning this type of construction project. The first step in preparing for pouring a cement pad is making sure you are wearing appropriate protection such as goggles, gloves, boots, and old clothes. Next you need to creeper or work from an elevated position on top of the foundation so that you stay off the ground until your concrete has cured which can take one week to two weeks depending on climate conditions. Safety is the number one priority when working with concrete. Cribbing is a technique for reinforcing an area before pouring, and it can be done by placing boards or blocks on either side of where you will pour your cement pad. This establishes a barrier to keep the wet concrete from spreading out in all directions once poured. Once cribbed, reinforce the foundation’s edges so that they are squared up and perpendicular to each other using rebar pins at strategic spots like corners or entryways into rooms. The last step prior to pouring your cement pad includes measuring how much water needs to be mixed together with dry ingredients such as sand, gravel, and/or crushed stone which usually requires three yards per 60 square feet of surface space. Before you start on pouring the concrete, ensure all the cribbing is firmly in place at the correct positions. After you have made the right measurements to create your cement pad, mix all of the ingredients together in a mixer. After that, start by pouring wet concrete on one edge and then slowly move it towards the opposite side working from back to front until you’ve reached where you started. You should use a trowel or shovel with an easy-to-grip handle for ease of maneuverability during this process. Once poured completely into place, let set for a day or two before driving over it as needed while not exceeding speeds of 20 miles per hour which can cause cracking or chipping due to vibrations. The last step is cleaning up using heavy duty brooms and sweepers once everything has dried out thoroughly so no debris remains on the surface. Concrete pad construction is not easy and should only be left in the hands of professionals who have the necessary experience, equipment, and knowledge required to complete a project safely. Anyone without these qualifications can end up doing more damage than good by risking injury or property damage alike if they attempt this on their own. Trusting a professional contractor is always a smart choice. The scope of such an undertaking requires expert assistance which cannot always be found at your local DIY store so it would be best to hire someone that will take care of everything from start to finish with no worries involved on your behalf.